
Binance
Step 1: Create an Account
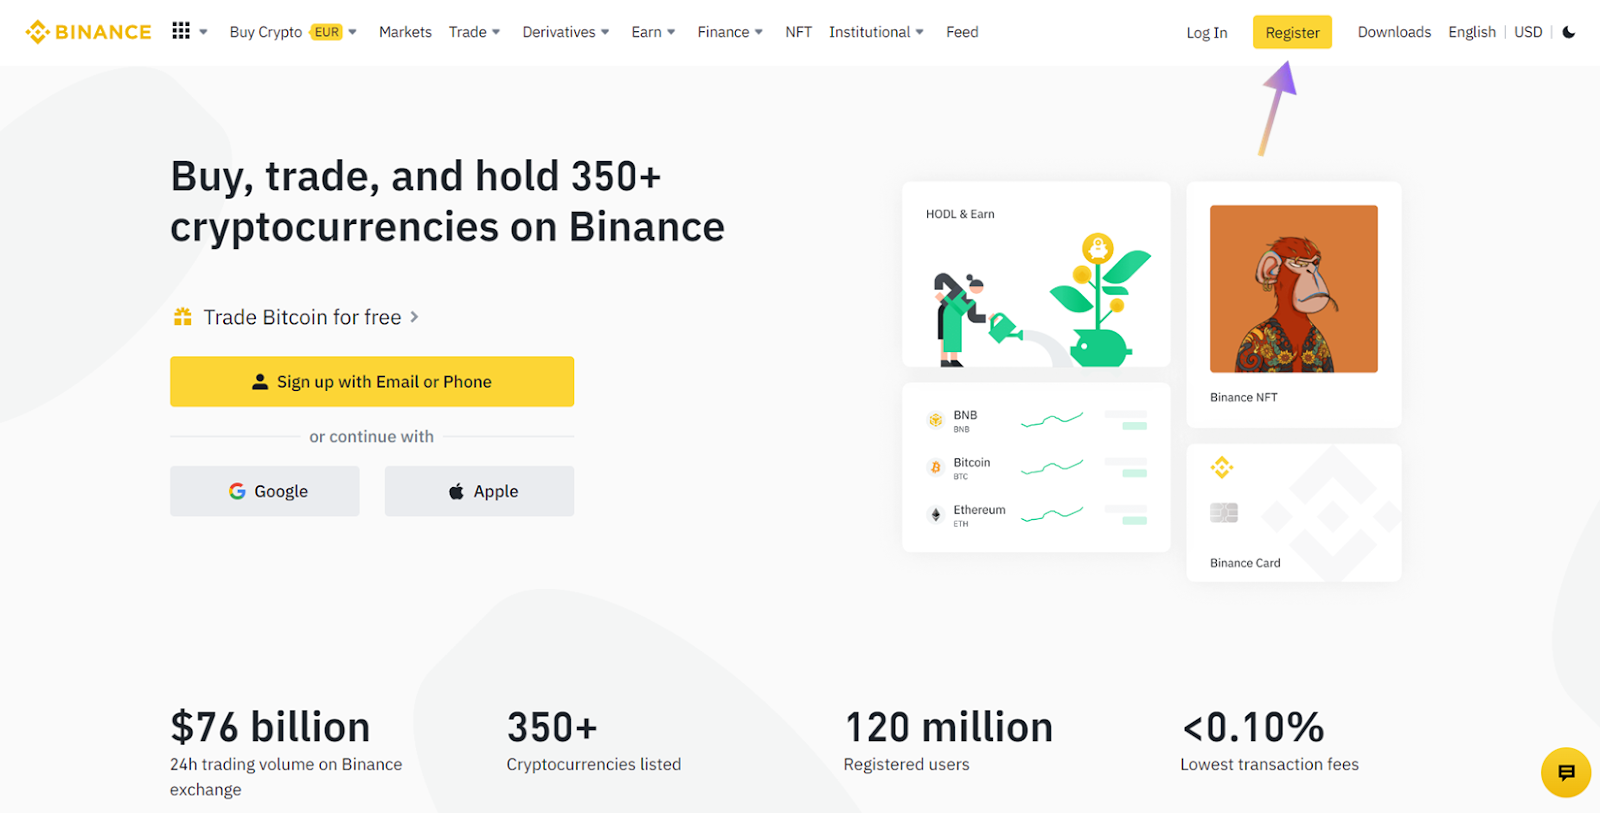
In this example, let's use Binance.
Navigate to binance.com and create an account if you don't already have one.
Step 2: Complete The KYC Process
KYC stands for “Know Your Customer” and is a standard procedure through which your identity can be verified. Once you’ve determined the level of KYC you wish to complete, submit all the necessary information and wait for approval.
Step 3: Depositing Fiat
To get started, you’ll first need to deposit fiat currency into your Binance account – “fiat” is currency that is declared as legal tender by a government, such as the US Dollar, Euro or British Pound.
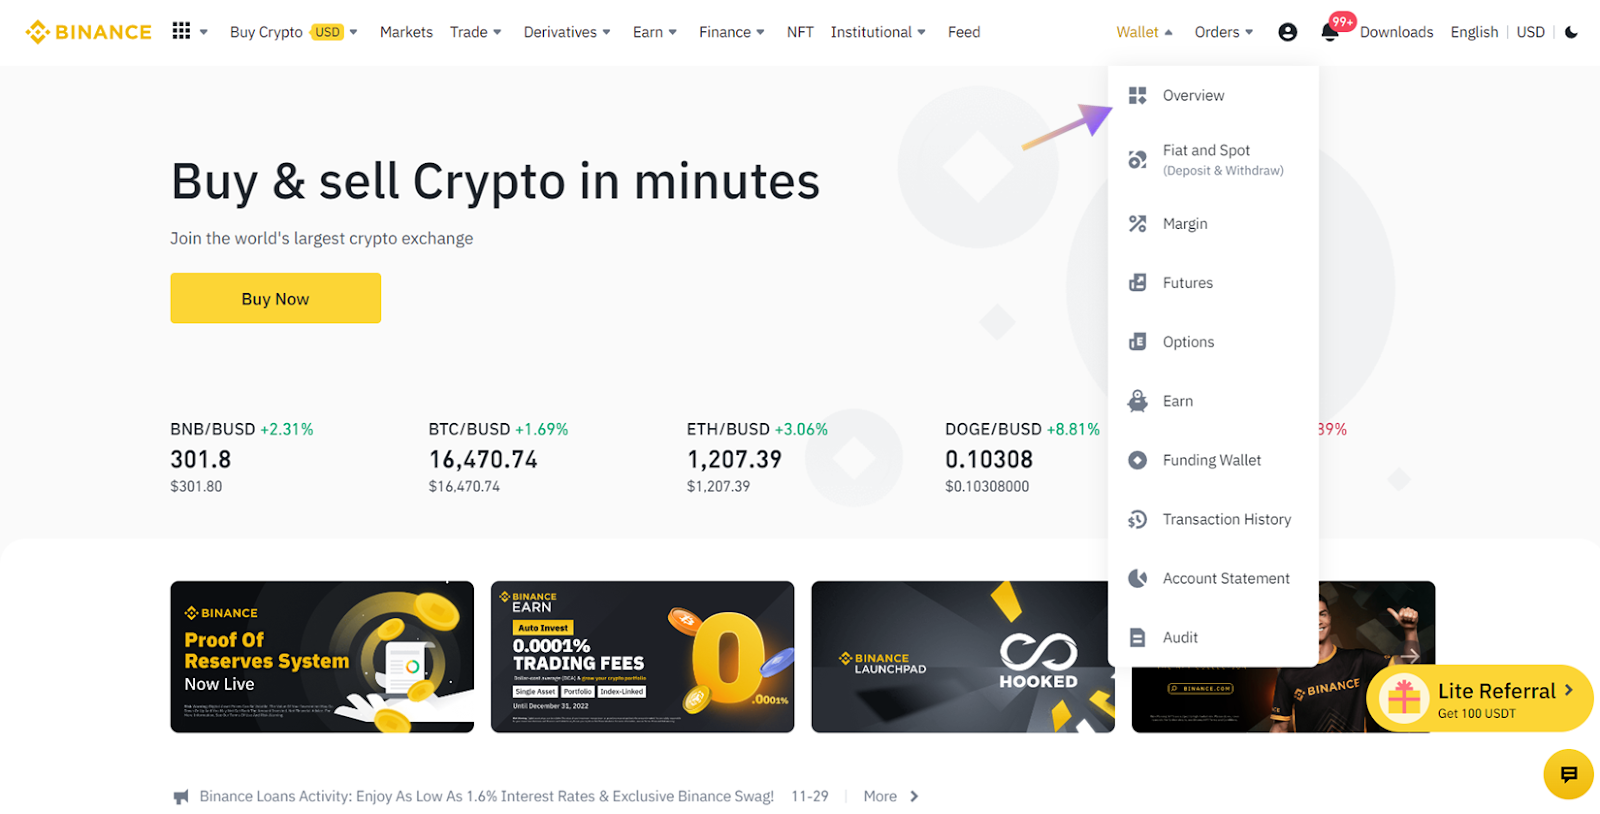
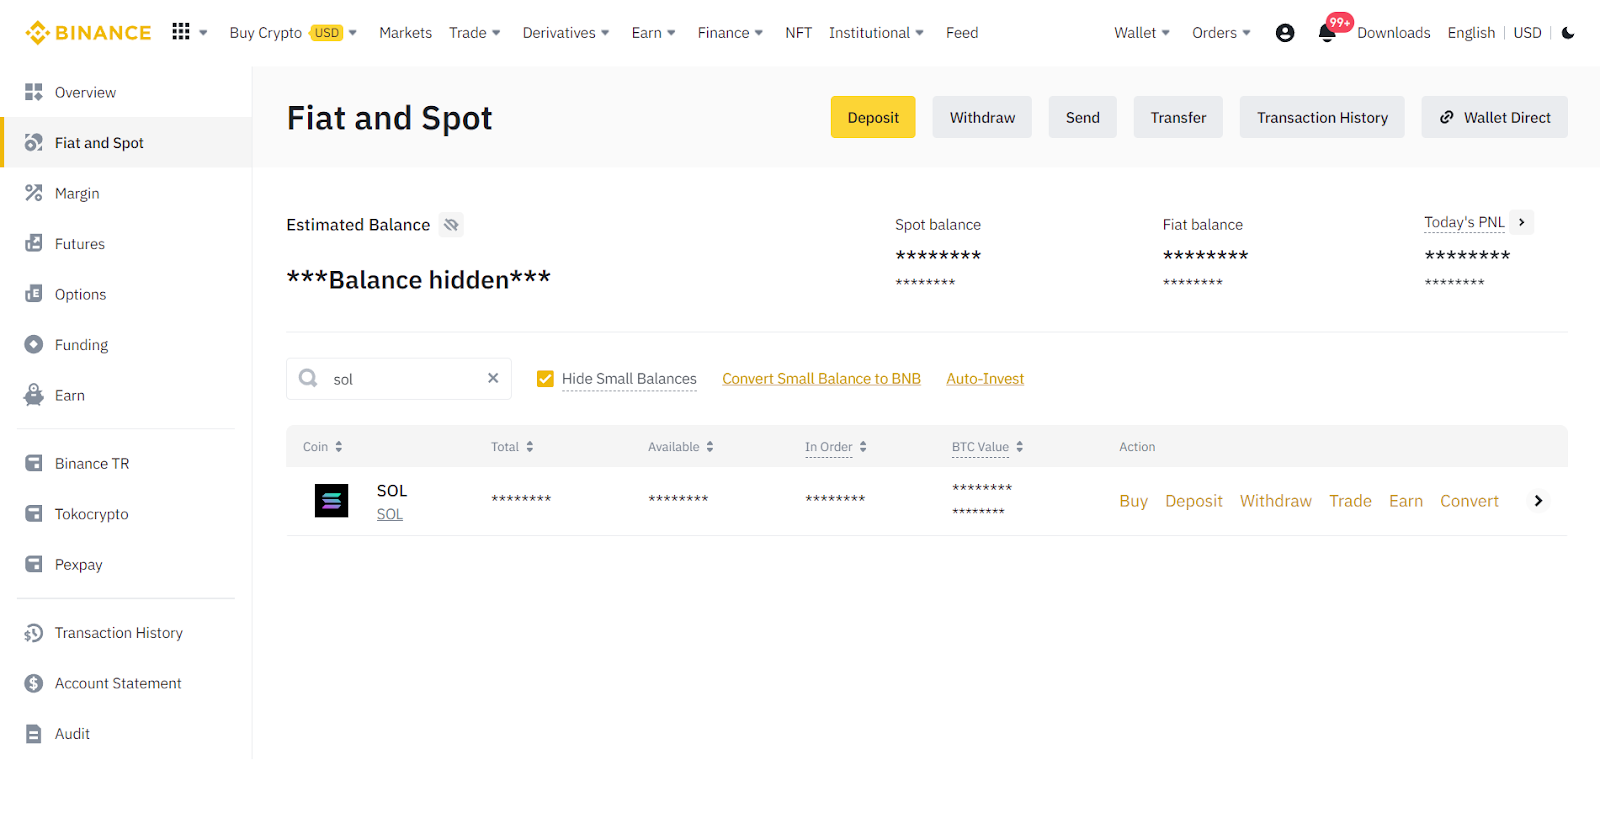
In order to deposit fiat, navigate to your wallet page by clicking on “Wallet” in the top right corner and select “Overview.”
Select the “Deposits” section and click the “Deposit” button.
Select the “Deposit Fiat” button and choose your preferred fiat currency and deposit method.

When you’ve successfully deposited fiat into your Binance account, you should see the deposited balance in your wallet portfolio page.
Step 4: Buying Crypto on Binance
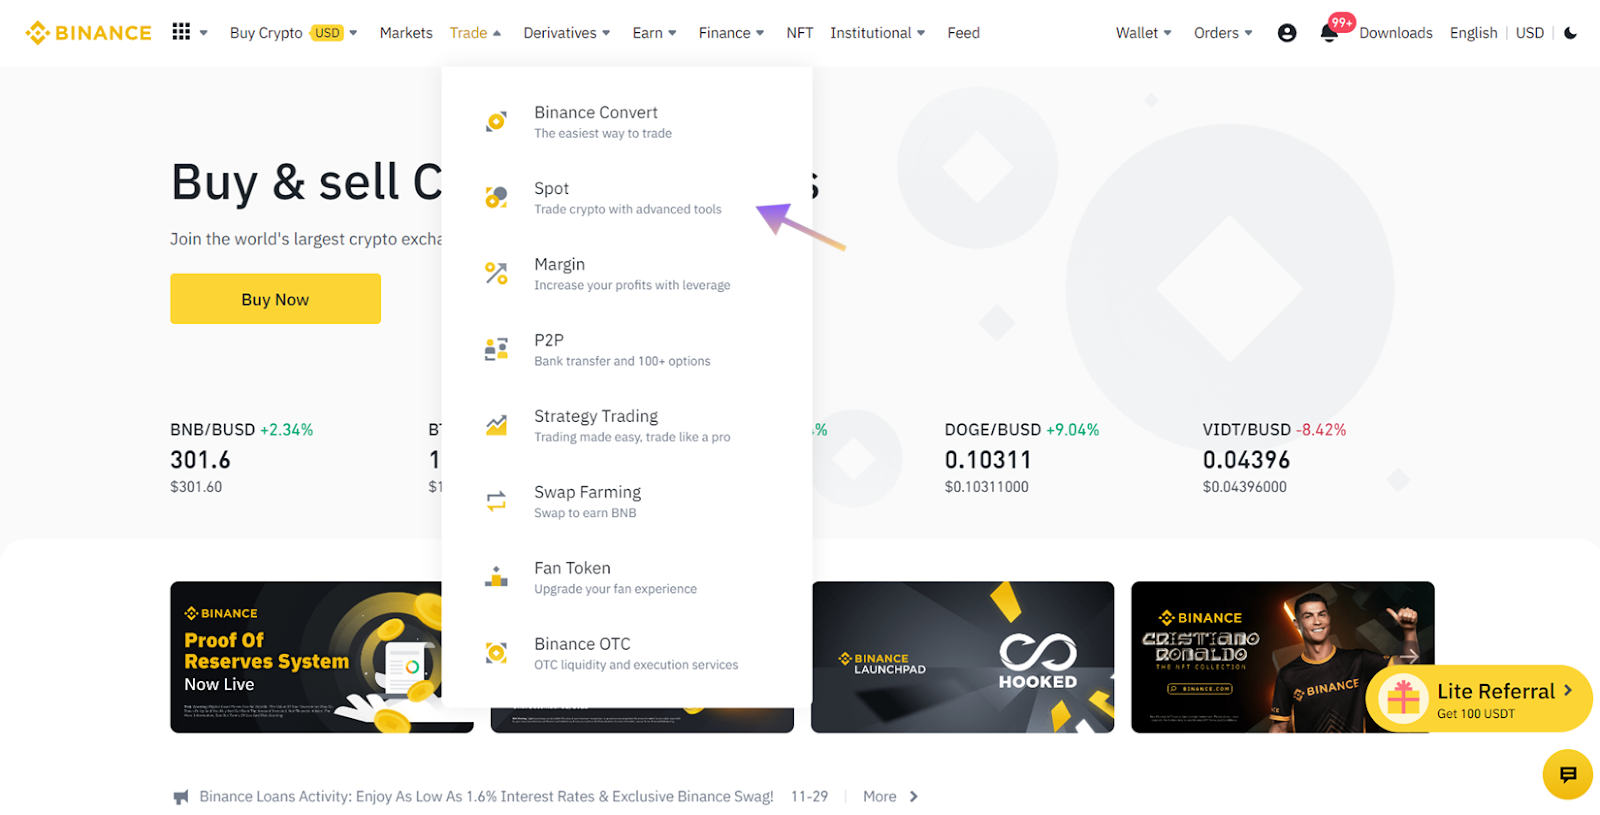
Navigate to the home page and click the “Trade” tab and select “Spot.”
You can type the name of any cryptocurrencies you’re interested in — such as “BTC”, “ETH” or “SOL” — into the search bar and select the one you wish to purchase.
In this example, you're purchasing SOL, the native asset of the Solana blockchain which is required to make transactions.

Input the amount you’d like to buy, review your order, and confirm your purchase.
Step 5: Self-custody
Once you've confirmed, you've successfully purchased cryptocurrency on Binance.
You should now be able to see the SOL you’ve bought in your Binance wallet.
Self-custody is paramount, particularly after the FTX meltdown.
In order to self-custody your digital assets, you will need to transfer them from a centralised exchange (CEX), such as Binance, to a non-custodial wallet.
For more on non-custodial wallets, browse through the Best Solana Wallets guide or follow the step-by-step guide on how to set up a Solana wallet.
Step 6: Withdrawing Your Crypto
You can send your SOL from Binance by navigating to the “Fiat and Spot” section of your Binance wallet and then selecting the “Withdraw” button.
Next, you’ll see a withdrawal page where you need to enter all the relevant details such as the amount you wish to withdraw and the address of your non-custodial Solana wallet.
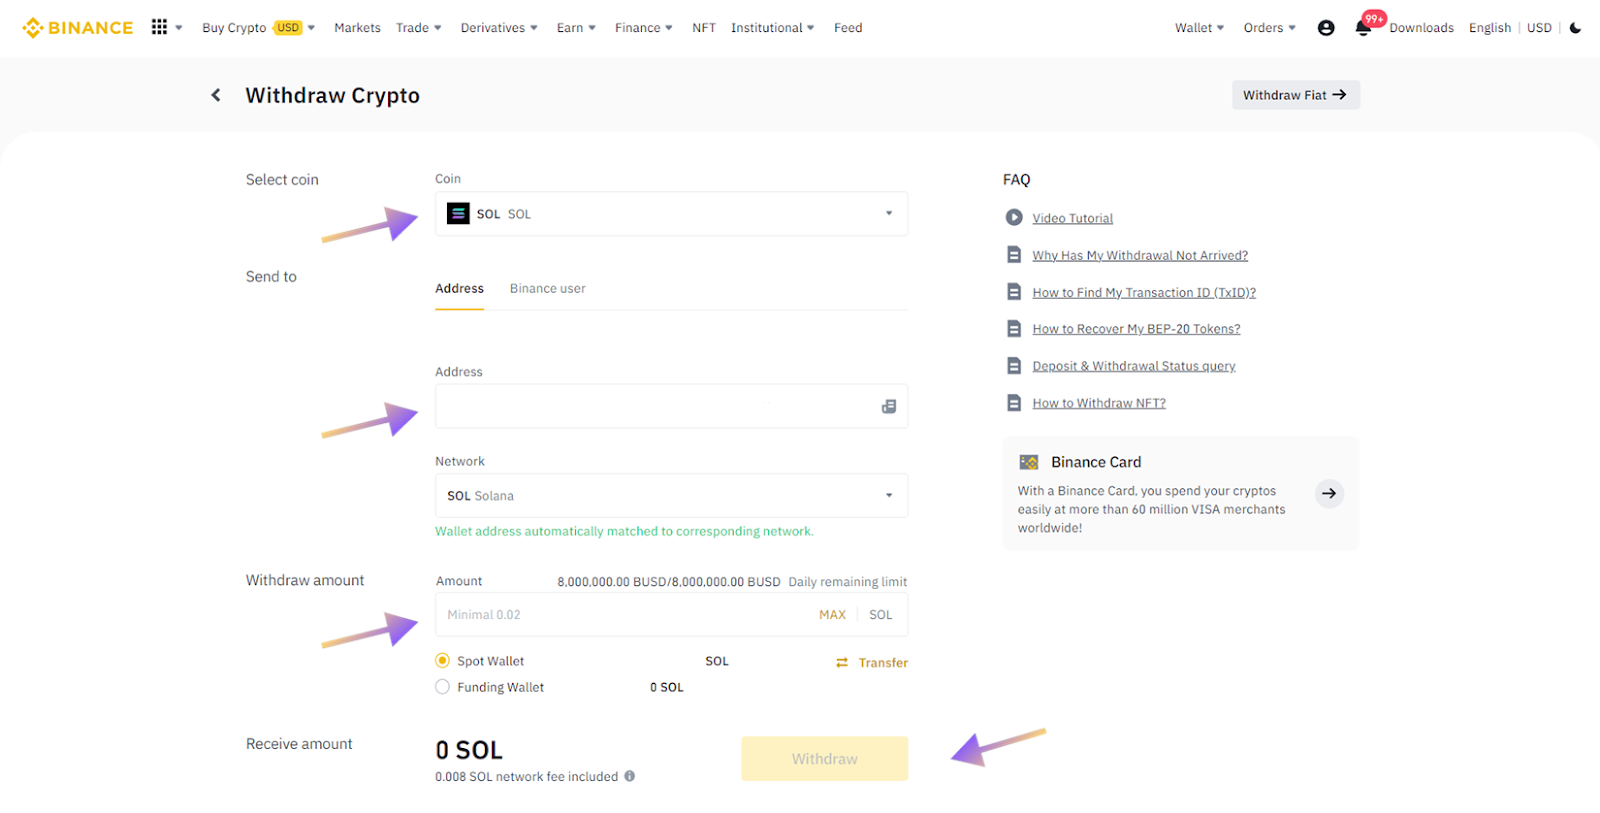
Once you’ve confirmed your withdrawal details, select the “Withdraw” button.
After a few minutes, your SOL should be available in your non-custodial Solana wallet.
Step 7: Deposit Funds Into Drift
The digital assets you purchased can be deposited into Drift as collateral to trade perpetual futures, borrow and earn yield.
For detailed instructions on how to do this, head over to the deposit and withdrawal guide.
Coinbase
Step 1: Create an Account
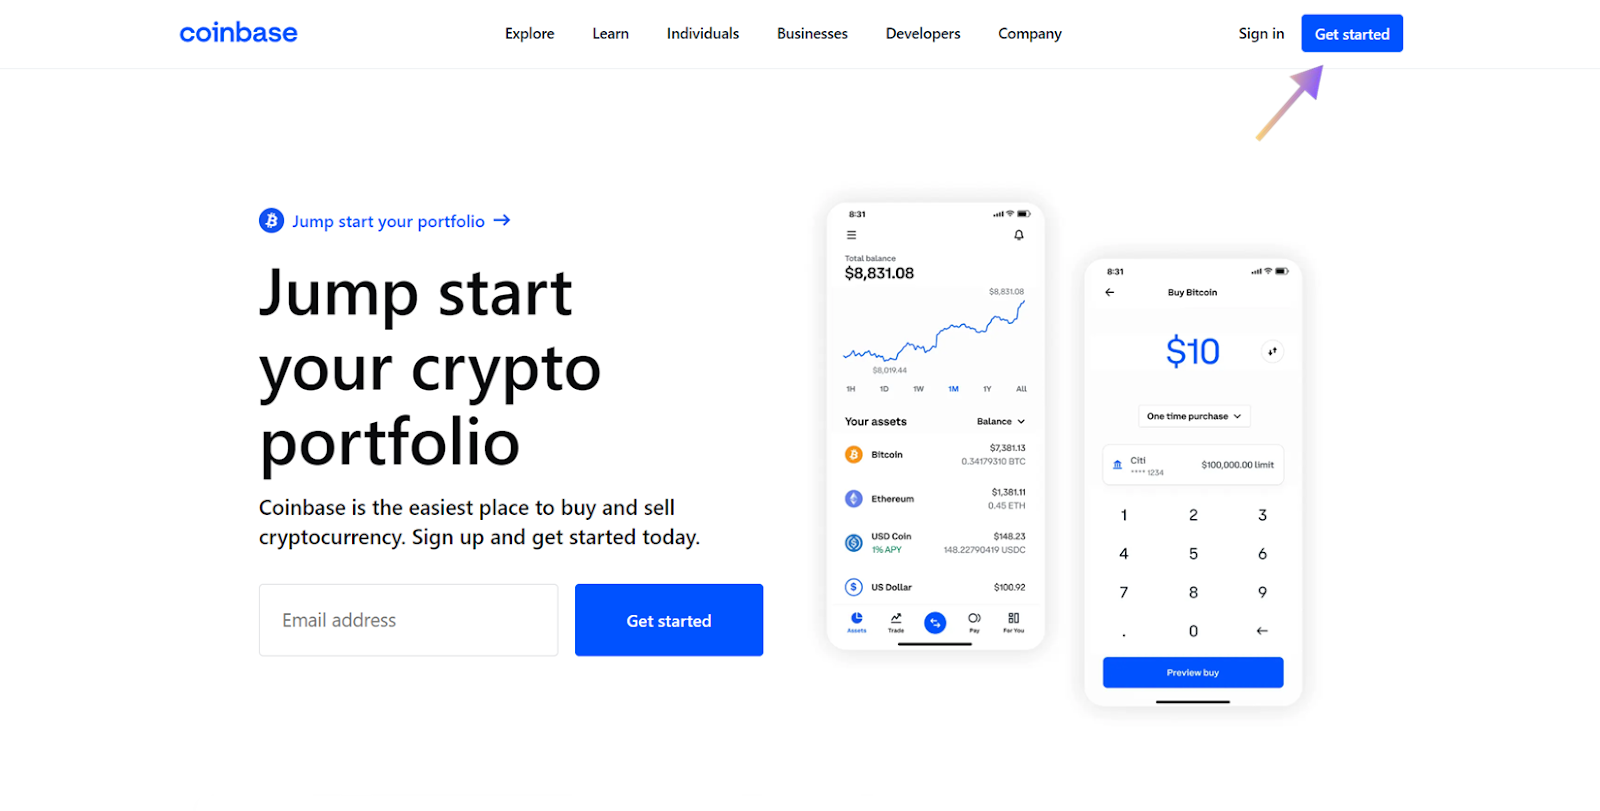
In this example, let's use Coinbase.
Navigate to coinbase.com and create an account if you don't already have one.
Step 2: Complete The KYC Process
Once you’ve determined the level of KYC you wish to complete, submit all the necessary information and wait for approval.
Step 3: Depositing Fiat
To get started, you’ll first need to deposit fiat currency into your Coinbase account.
In order to deposit fiat, navigate to the home page by clicking on “Home” in the top left corner and then selecting “Add Payment Method.”
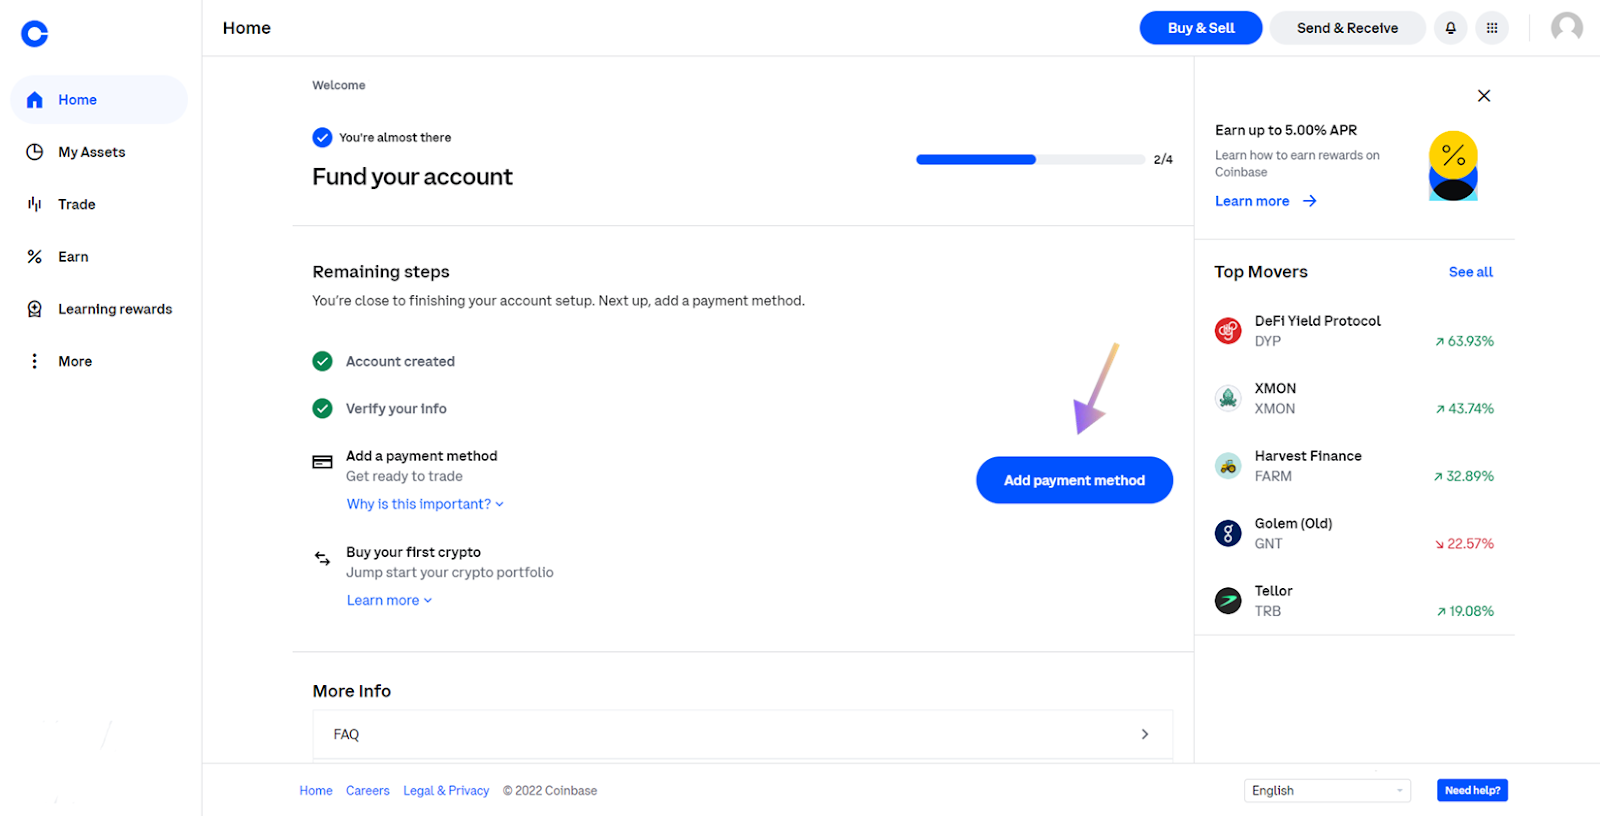
Once you’ve done that, select your preferred payment method and fill in the subsequent details.

When you’ve successfully deposited fiat, you should see the deposited balance in the “My Assets” section.
Step 4: Buying Crypto on Kraken
Navigate to the Coinbase trade page and click the “Trade” button.
Type “BTC”, “ETH” or “SOL” into the search bar and select the trade pair you wish to purchase.

Next, fill out the order form, review your order and confirm your purchase.
Step 5: Withdrawing Your Crypto from Coinbase
Navigate to the “My Assets” page and select the “Send/Receive” button on the top right and choose the “Send” option.
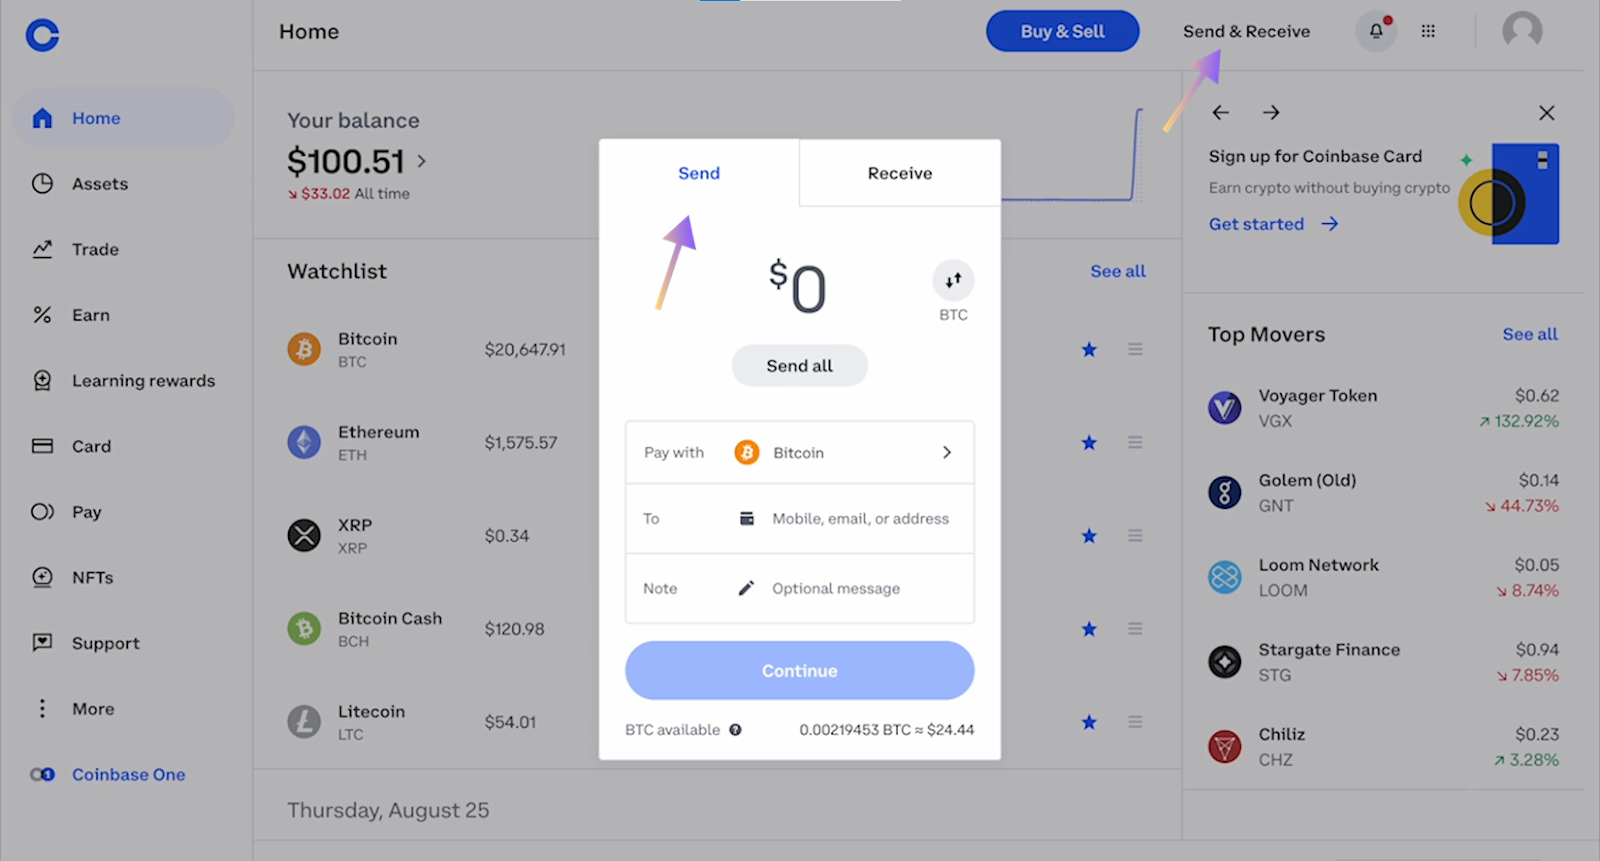
Select the digital asset you wish to withdraw by clicking the “Pay with” section and typing in “BTC” “ETH”, “SOL” etc. In this example, you're using SOL.
Enter your Solana wallet address that you want to withdraw to, click the “Continue” button, confirm the withdrawal details and click “Send now.”
After a few minutes, your digital assets should be available in your non-custodial Solana wallet.
Not all digital assets can be sent from a CEX to your Solana wallet, so make sure that the asset you are sending is specified as a SPL token.
Step 6: Deposit Funds Into Drift
The digital assets you purchased can be deposited into Drift as collateral to trade perpetual futures, borrow and earn yield.
For more, read the deposit and withdrawal guide.
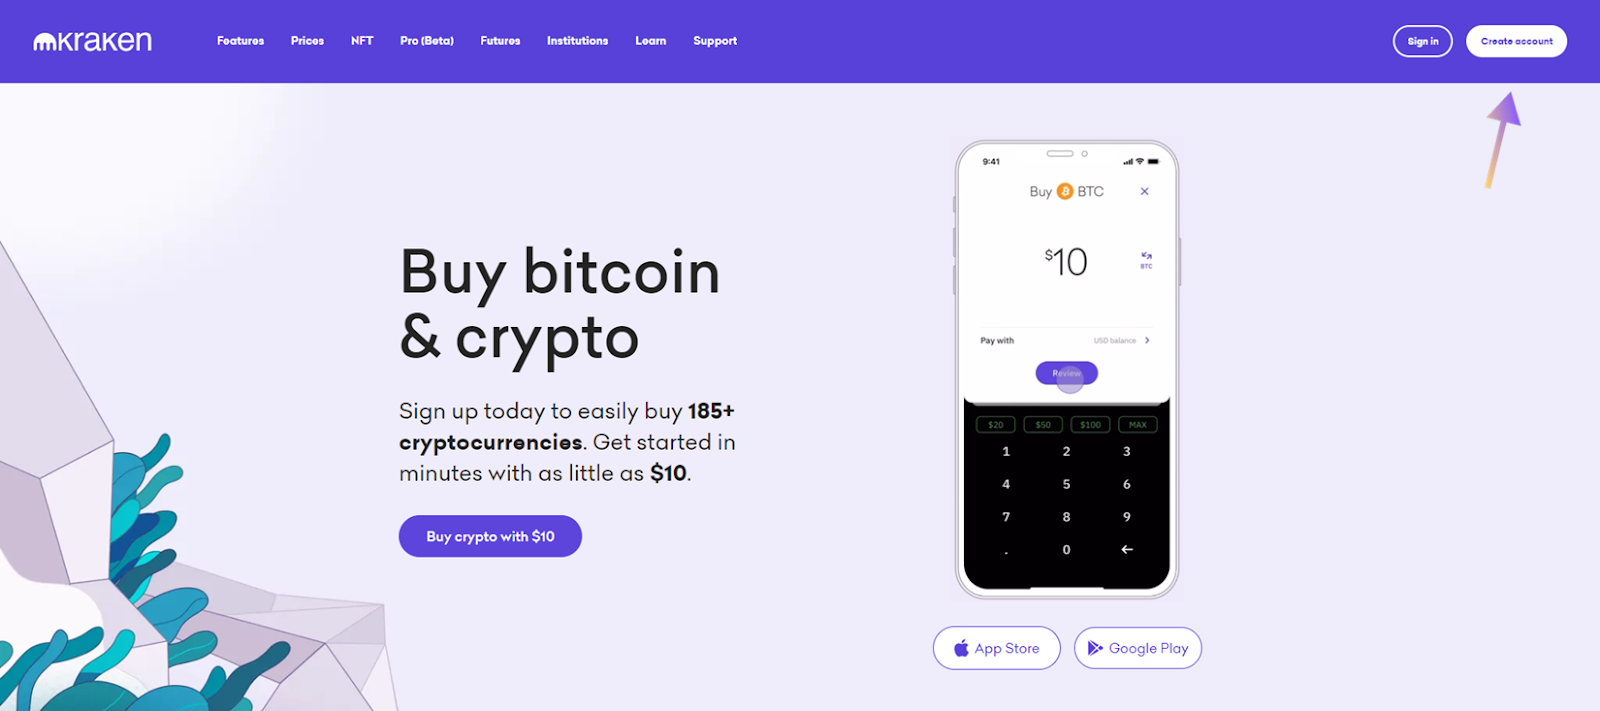
Kraken
Step 1: Create an Account
In this example, let's use Kraken.
Navigate to kraken.com and create an account if you don't already have one.
Step 2: Complete The KYC Process
Once you’ve determined the level of KYC you wish to complete, submit all the necessary information and wait for approval.
Step 3: Depositing Fiat
To get started, you will first need to deposit fiat currency into your Kraken account.
In order to deposit fiat, select the “Buy Crypto” button in the navigation bar and select your preferred deposit/payment method.
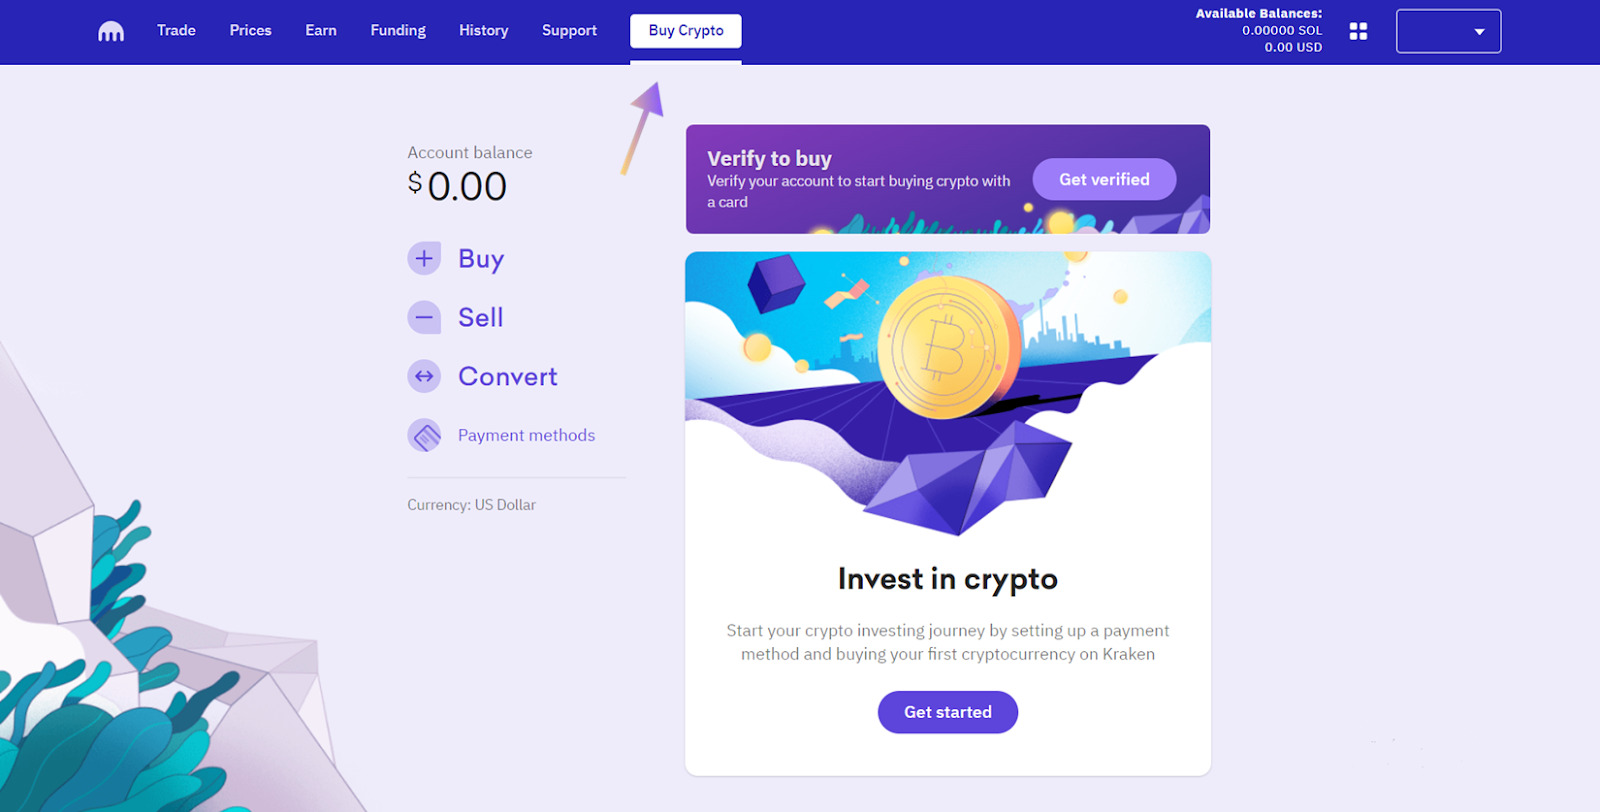
When you’ve successfully deposited fiat into your Kraken account, you can see the deposited balance by clicking on the Kraken logo in the top left or by viewing the “Available Balances” section on the top right.

Step 4: Buying Crypto on Kraken
Navigate to the “Trade” page by clicking on the “Trade” button in the navigation bar.
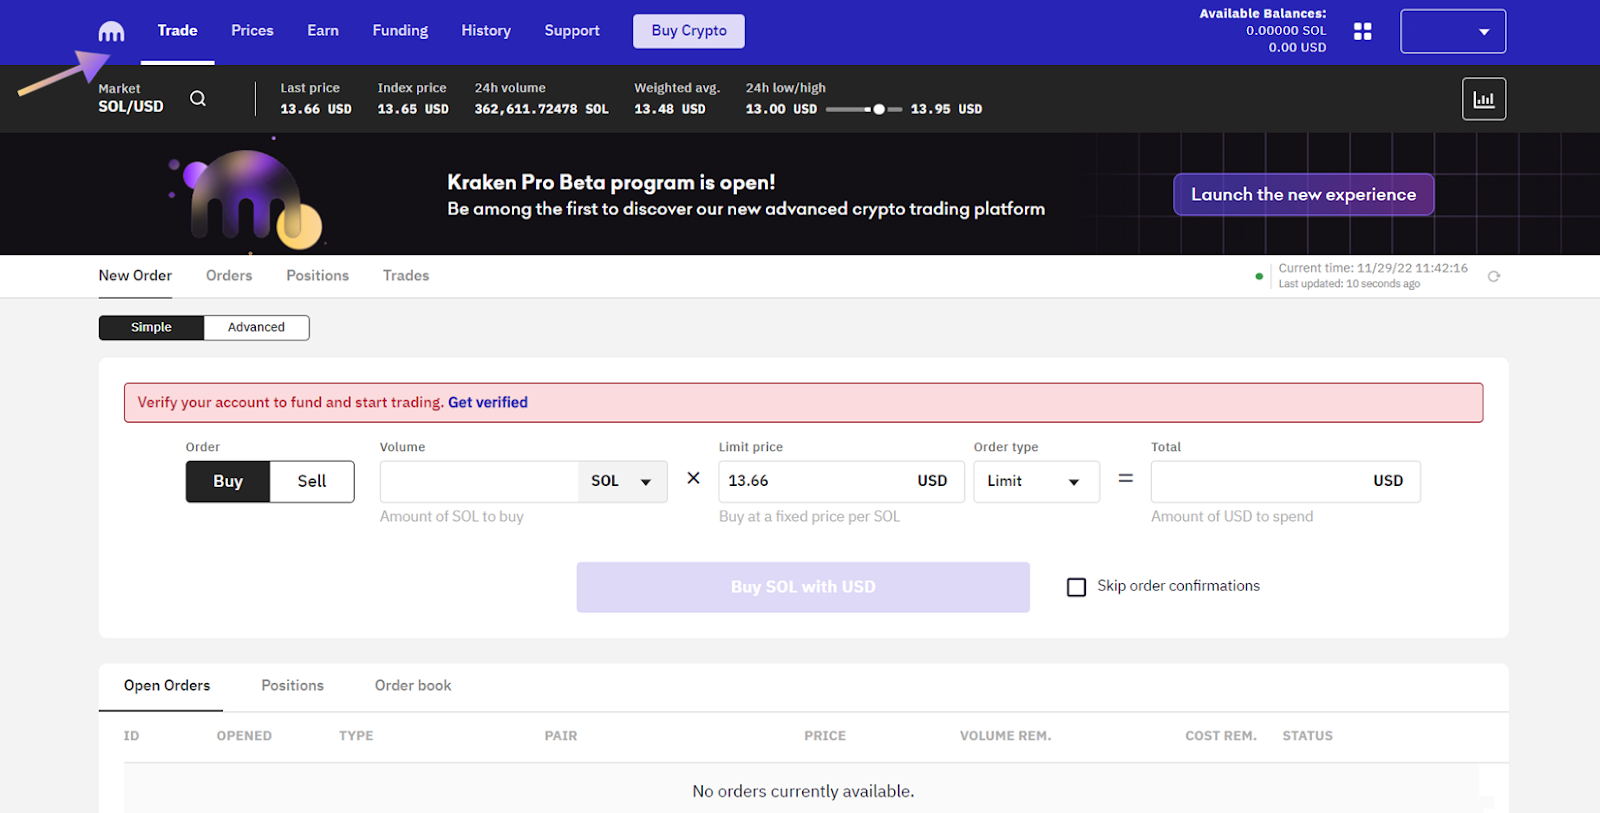
Choose “BTC”, “ETH” or “SOL” from the drop down menu, key in the amount of crypto you’d like to purchase and confirm your order.
Step 5: Withdrawing Your Cryptocurrency
Navigate to the “Funding” page by clicking on the “Funding” button in the navigation bar and click the “Withdraw” button.
Select the asset you wish to withdraw (for this example you're using SOL), click the “Add address” button and enter your Solana wallet address that you want to withdraw to.
Enter the amount of crypto you wish to withdraw, confirm the withdrawal details and click the “Withdraw” button.

After a few minutes, your digital assets should be available in your non-custodial Solana wallet.
Not all digital assets can be sent from a CEX to your Solana wallets, so make sure that the asset you are sending is specified as a SPL token.
Step 6: Deposit Funds Into Drift
The digital assets you purchased can be deposited into Drift as collateral to trade perpetual futures, borrow and earn yield.
For more, read the deposit and withdrawal guide.
MoonPay (Credit Card Purchase)
Step 1: Activate MoonPay
Select the “Buy” button in your Phantom wallet, click “Solana” or “SOL” and enter the amount you wish to buy.
Next, select “Moonpay” as your preferred purchasing method.

You’ll then be redirected to a pop-up window of Moonpay’s website.
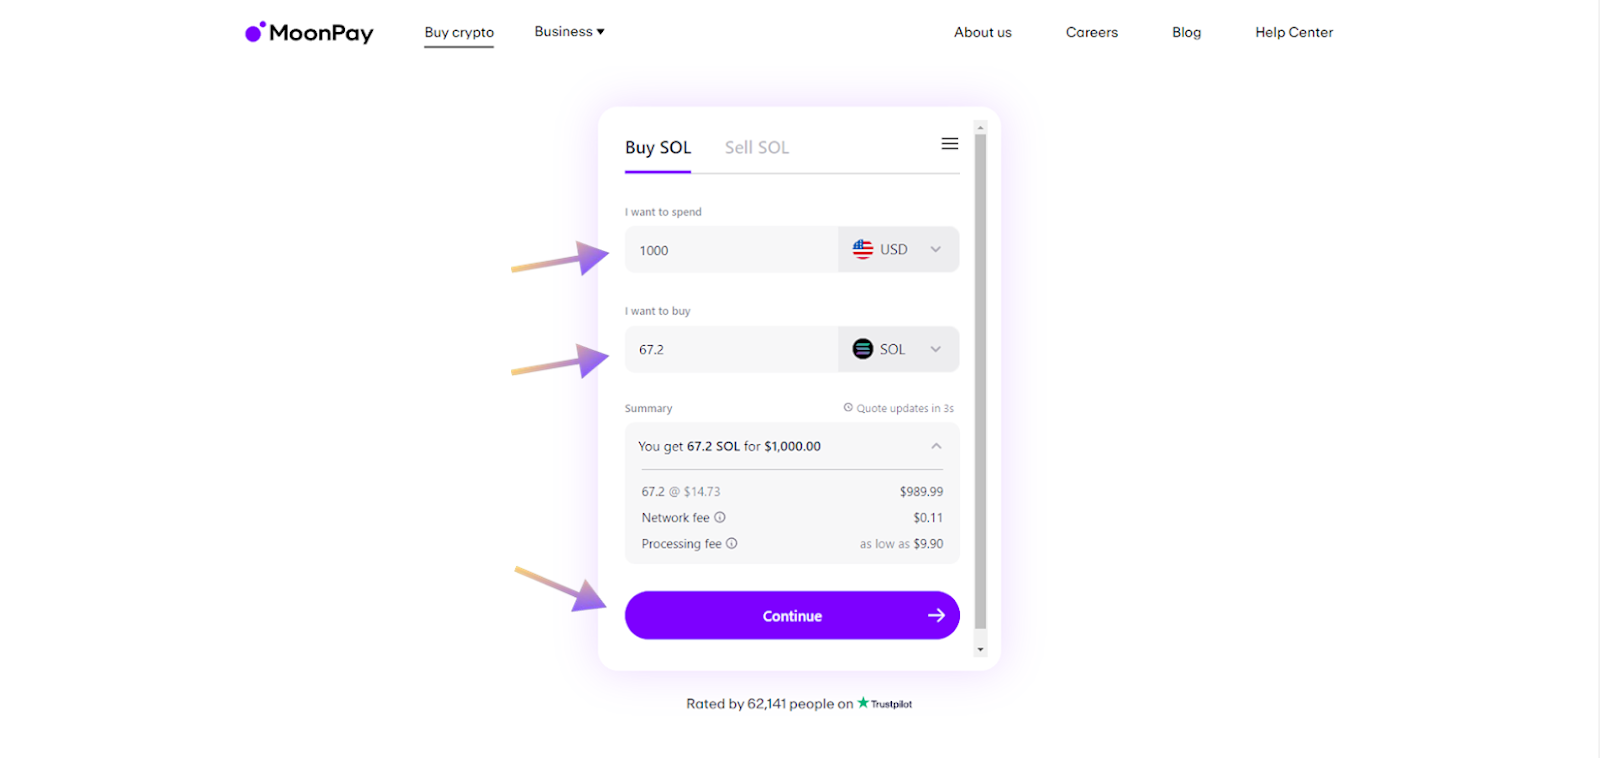
Step 2: Specify Purchasing Details
In this example, you'll be selecting SOL and choosing USD as the fiat you want to use.
Once you have specified your purchasing details, click “Continue”.
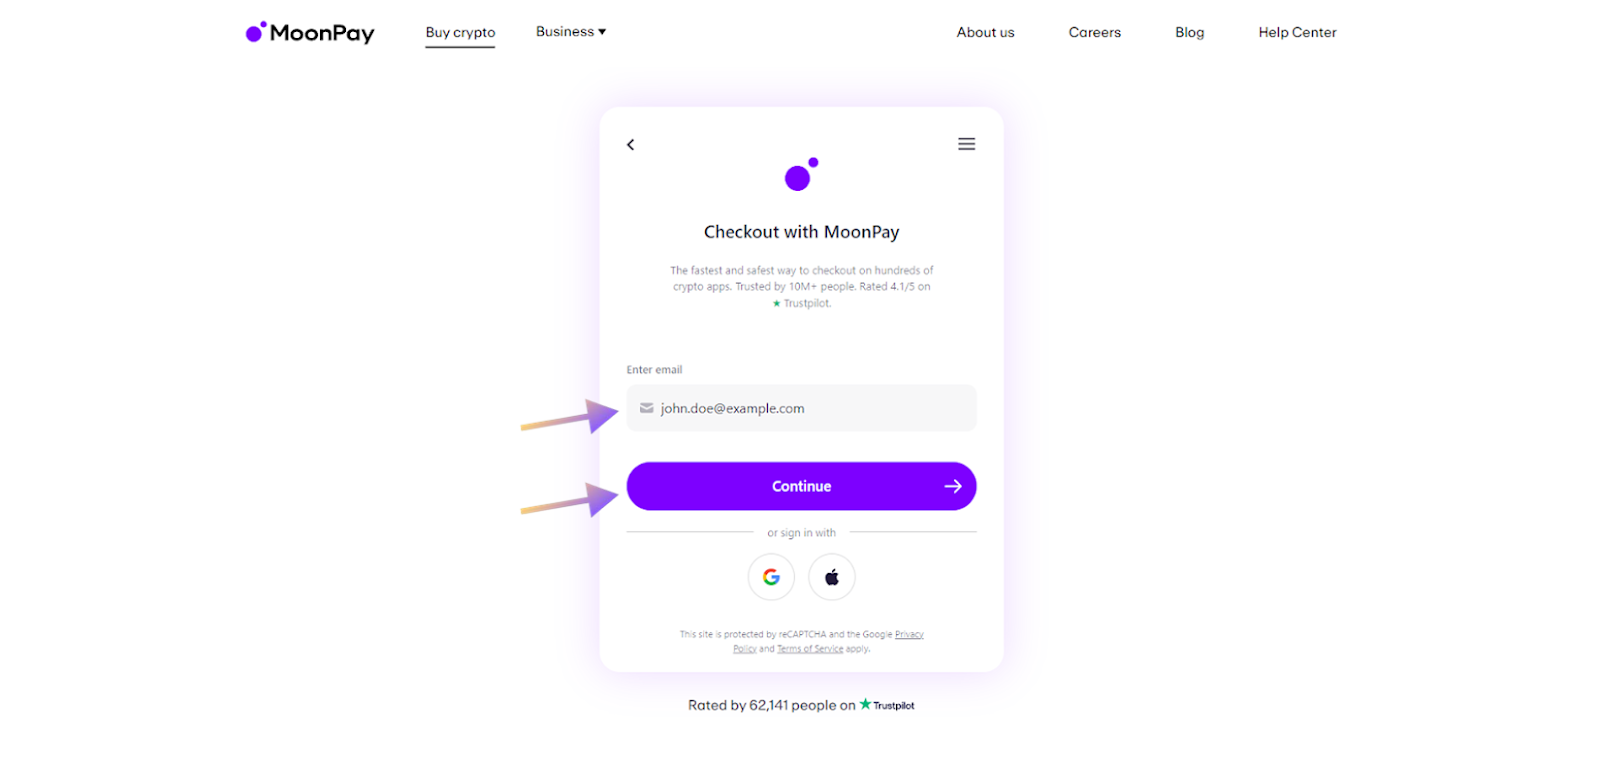
Step 3: Enter Your Email Address
In the next step you’ll be asked to enter your email address.
Once you have done so, a verification code will be sent to your email inbox.
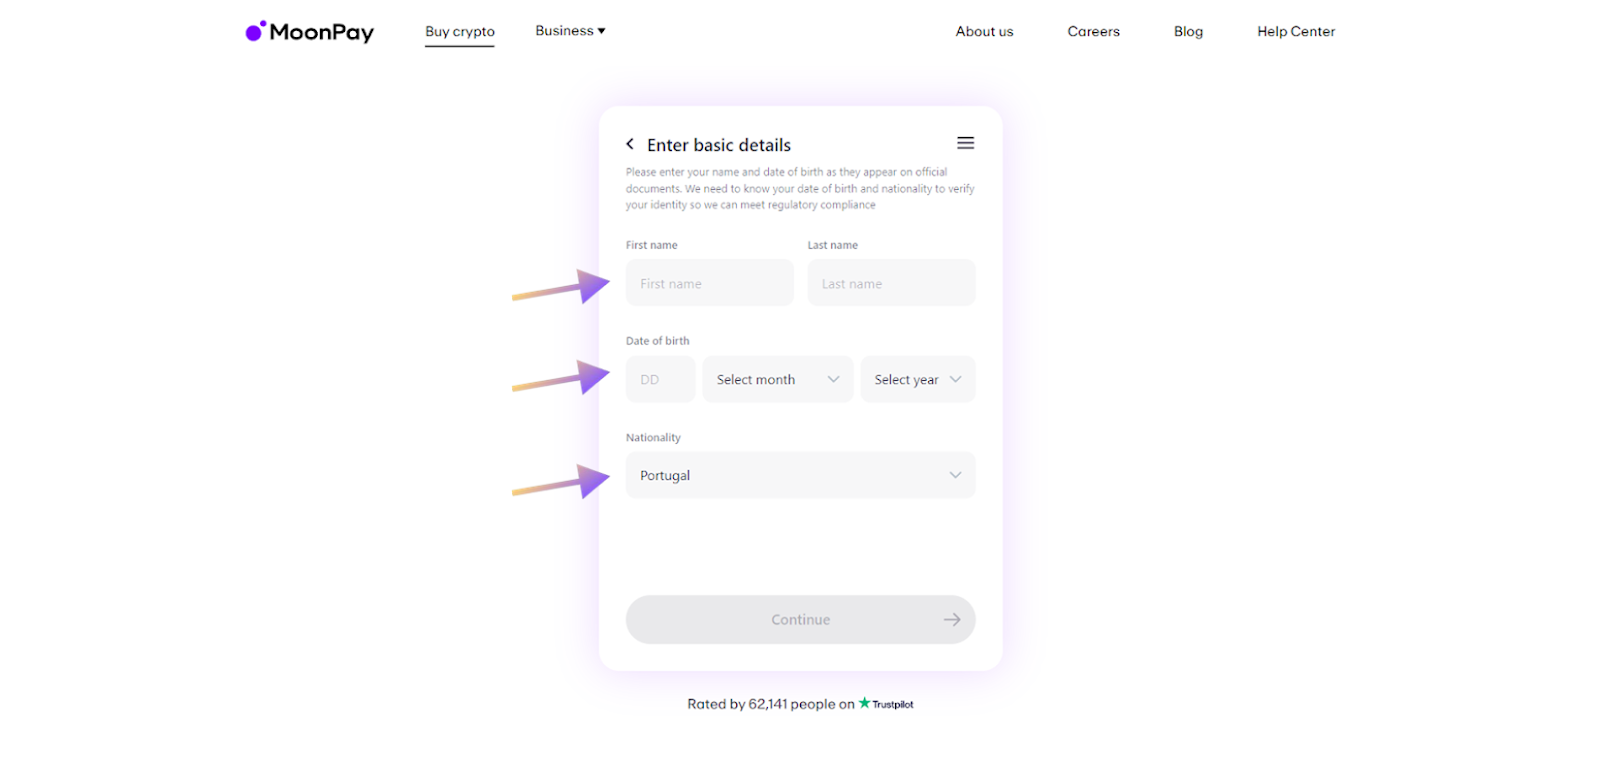
Step 4: Enter Your Personal Details
Next you’ll be asked to enter your personal details, which include your first and last name, date of birth, nationality and billing address.
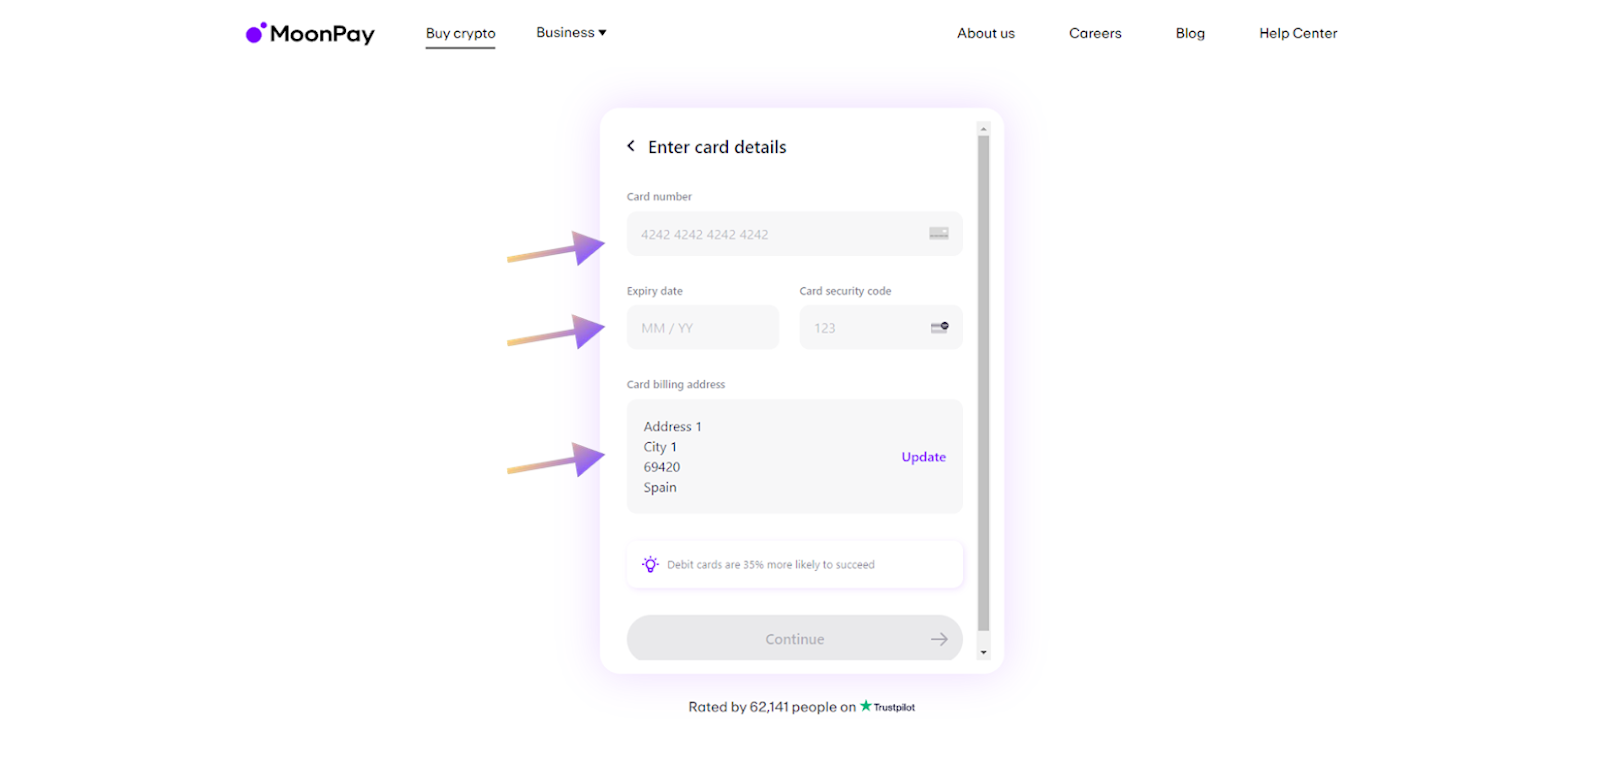
Step 5: Enter Your Card Details
After completing the previous step, you’ll be able to submit your card details—card number, expiry date and security code.
Step 6: Complete The Registration
Once you’ve completed the registration, your SOL purchase will go through.
After a couple of minutes, you should be able to see the SOL in your Phantom wallet!
Step 7: Trade on Drift
You can deposit the USDC and SOL you purchased to use as collateral on Drift and start trading, earning yield, and borrowing.
For more on Drift, head over to the Learn hub.


